
In order to configure incoming filtering for Exchange Online/Microsoft 365 follow these steps:
- Step 1 - Add the domain in Spam Experts
- Step 2 - Create a partner connector and rule in Exchange Online to accept filtered mail
- Step 3 - Change MX record for the domain to point to incoming servers
- Step 4 - Disable Safe Links Processing to permit Email Scout Reports and Protection Reports
Step 1 - Add the domain in Spam Experts
Domains can be added in these ways:
To add the domain manually:
- Login to Spam Experts as an Admin Level user
- Navigate to General > Add Domain
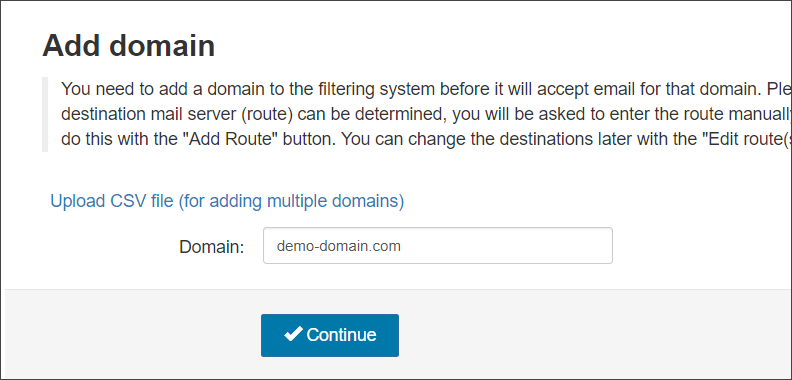
- Enter your fully qualified domain name and click Continue
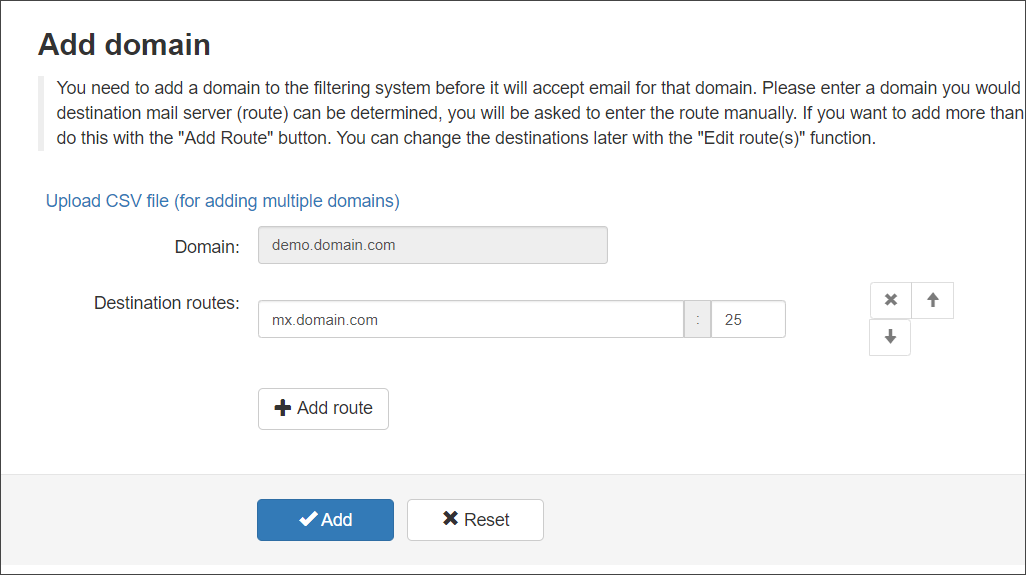
- Add your Destination Route hostname where incoming mail is being routed through after filtering
- To keep message logs and quarantine storage within a specific geographic region, choose the territory from the Region dropdown:
- Global
- Europe
- APAC
This does not affect the mail-flow into and out of the domain. Specific Geographic MX records and relay servers must be used to alter mail-flow locations.
We recommend using the default Global region to make optimal use of our globally distributed cloud and infrastructure redundancy. When selected, our Global data centers are used for email filtering, logging and quarantine.
- Choose to enable Email Scout Reports - This will automatically enable Email Scout Reports so that they are sent to each recipient in your domain, up to 3 times a day
- Click Next
- Confirm the details of the domain to add and click Add and configure, which will take you into the domain to continue configuration, or Add and go to overview, which will take you to the Domain Overview page where you will see the new domain added to the Domains list
If you do not have a specific destination server route to add from the start, Spam Experts will automatically fill in a suggested destination route for you (this route is detected from the domain's existing MX records if present), with a default destination port 25.
For more information on how to find your Destination server address, see Find Destination Server Hostname
Add multiple routes here for load balancing purposes.
Once you have set your destination route(s) here, they will be displayed in the Incoming > Destinations page -
- Login to Spam Experts as an Admin Level user
This should be the domains parent admin (the admin to which the domain is assigned)
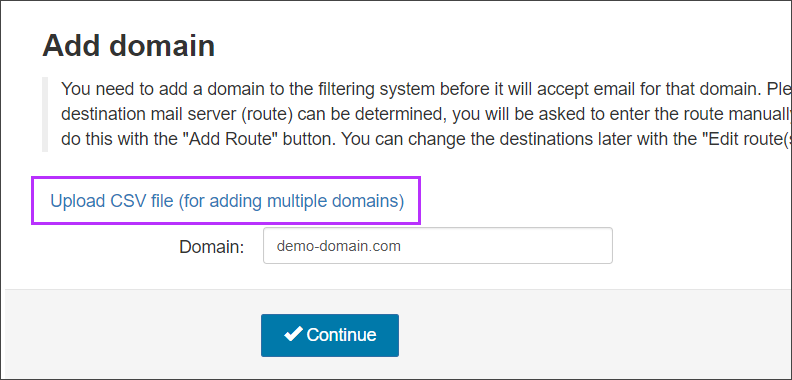
- Click on General > Add Domain
- Select Upload CSV file
- You will now be taken to the Upload CSV file page. From here, use browse to navigate to the files location on the local computer
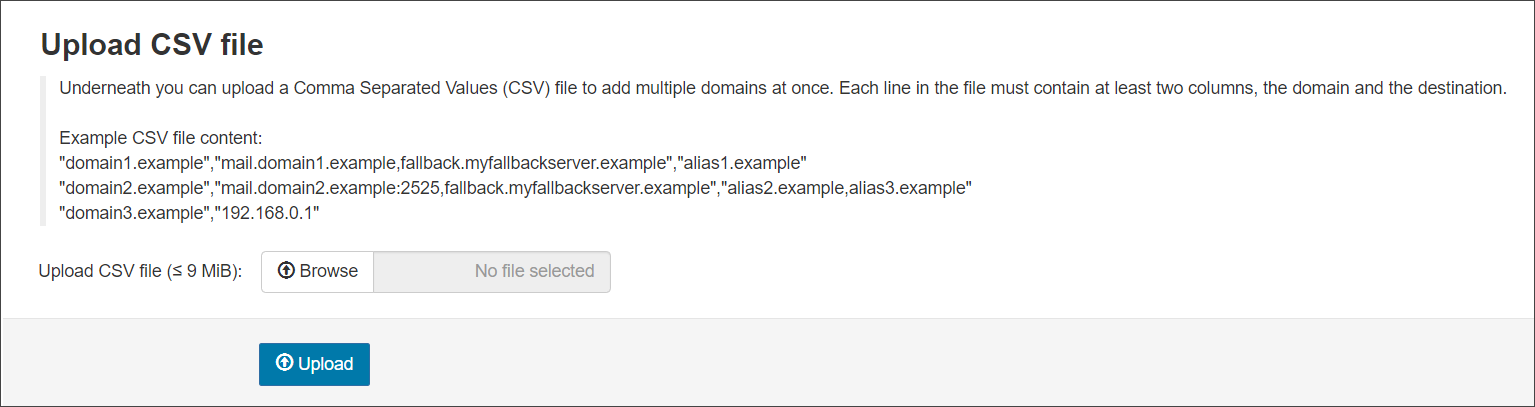
- Select Upload to import the domains
Any issue identified with the file are reported in the "Upload CSV file" section. For example it was not a CSV file.
Step 2 - Create a partner connector and rule in Exchange Online to accept filtered mail
For further details about creating a partner connector and rule in either the Classic EAC or the New EAC in Microsoft 365, ensure you fully read the Microsoft documentation page.
Before beginning, ensure you are a member of the Organization Management role groups in the Microsoft 365 defender portal and Exchange Online.
Step 2:1 - Create the Partner Connector in the Exchange Admin Center
- Log in to the Exchange Admin Center with Organization Management admin credentials
- Click on Mail Flow > Connectors
- Click the + button to add a connector
- Choose the following:
- Connection From - Partner organization
- Connection To - Microsoft 365
- Click Next
- Give the connector a Name you will recognize in Step 2:2 #5 and optionally, provide a description
- Ensure the What do you want to do after connector is saved setting, Turn it On is selected
- Click Next
- Choose By verifying that the IP address of the sending server matches one of the following IP addresses, which belong to your partner organization
- Add the following Spam Experts delivery IP ranges one at a time and click the + symbol:
130.117.251.9/25185.201.16.0/22185.201.16.0/24185.201.17.0/24185.201.18.0/24185.201.19.0/24
IP sub-ranges:
192.69.18.0/24208.70.90.0/2445.91.121.0/2445.93.148.0/2445.131.180.0/2445.140.132.0/24193.41.32.0/24185.225.27.0/2480.91.219.0/24188.190.113.0/2445.147.95.0/2446.229.240.0/2487.236.163.0/24188.190.112.0/24192.69.19.0/24208.70.91.0/24185.209.51.0/24185.218.226.0/24
- Add the following Spam Experts delivery IP ranges one at a time and click the + symbol:
Download the complete and up-to-date CSV list of delivery IP ranges
Step 2:2 - Create the Rule in the Microsoft 365 Defender Security Portal
- Login to the Microsoft 365 defender security portal with Organization Management admin credentials
- Under the Email & Collaboration section of the left-hand menu, select Policies & Rules
- Click Threat Policies
- Scroll to the Rules section and select Enhanced Filtering
- Select the Connector Name as created in step 2:1
- Select Skip these IP addresses and input the following:
185.201.16.0/22192.69.18.0/24208.70.90.0/2445.91.121.0/2445.93.148.0/2445.131.180.0/2445.140.132.0/24193.41.32.0/24185.225.27.0/2480.91.219.0/24188.190.113.0/2445.147.95.0/2446.229.240.0/2487.236.163.0/24188.190.112.0/24192.69.19.0/24208.70.91.0/24185.209.51.0/24185.218.226.0/24130.117.251.9/25Once added, this IP address may update to
130.117.251.0/25. This is acceptable behavior as both IP's fall under the same subnet.199.115.117.7/3246.165.223.16/3294.75.244.176/32Download the complete and up-to-date CSV list of delivery IP ranges
You must click the IP address that matches what is typed in order for it to be added successfully:
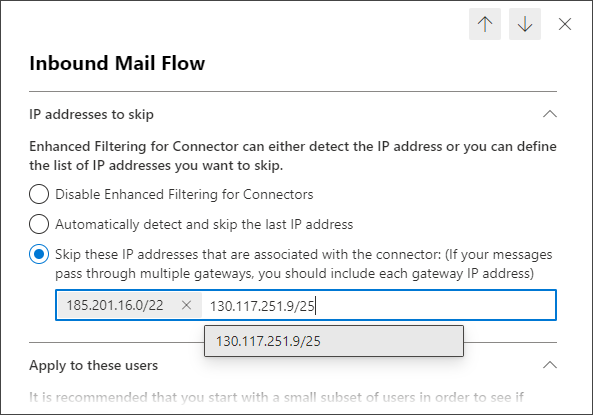
- Under Apply to these users, select Apply to Entire Organization
- Click Save
Failing to setup the partner connector correctly will cause messages to be incorrectly rejected by the Microsoft systems.
Step 3 - Change MX record for the domain to point to incoming servers
Once you have verified configuration as above, update the domain's MX records to route mail through Spam Experts. For full details on MX records (including region specific MX records), see Hosted Cloud MX Records.
Step 4 - Disable Safe Links Processing to permit Email Scout Reports and Protection Reports
When using Spam Experts and Microsoft 365, Microsoft Advanced Threat Protection scans all links within messages, including the links within Email Scout Reports and Protection Reports and triggers the links to release or release and train messages.
Disable this by:
- Log in to the Exchange Admin Center with Organization Management admin credentials
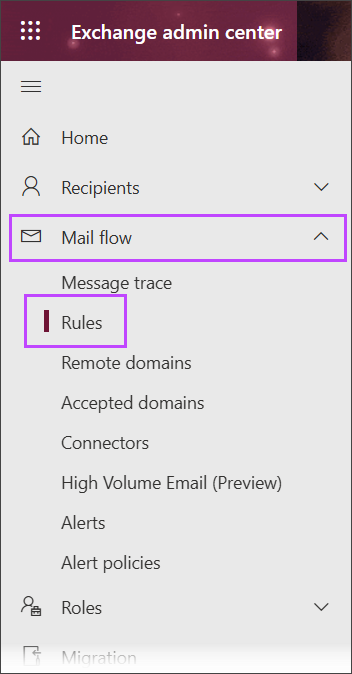
- In the left-hand menu, expand the Mail flow heading and open the Rules page
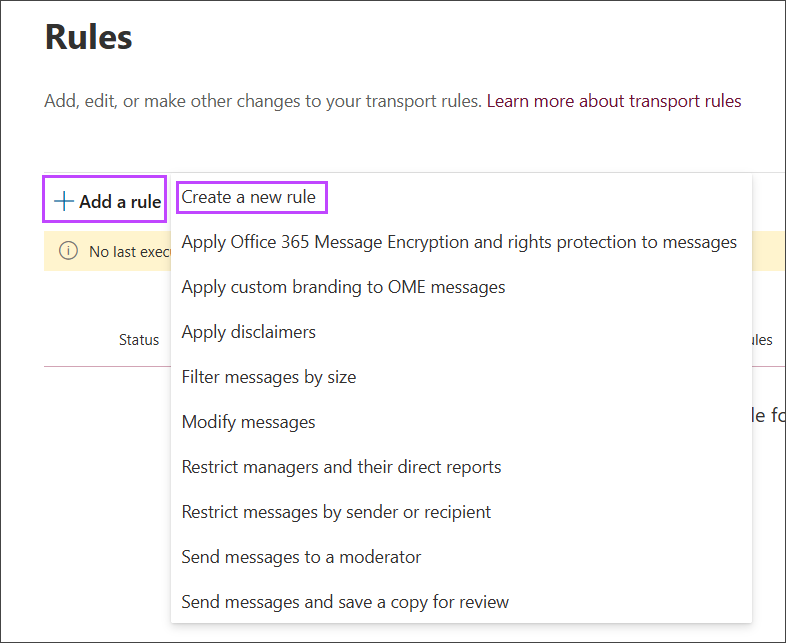
- Select Add a rule, then choose Create a new rule from the list
- Select the conditions and actions for this rule:
- Name - Give the rule a memorable name so that you can easily find it in the list

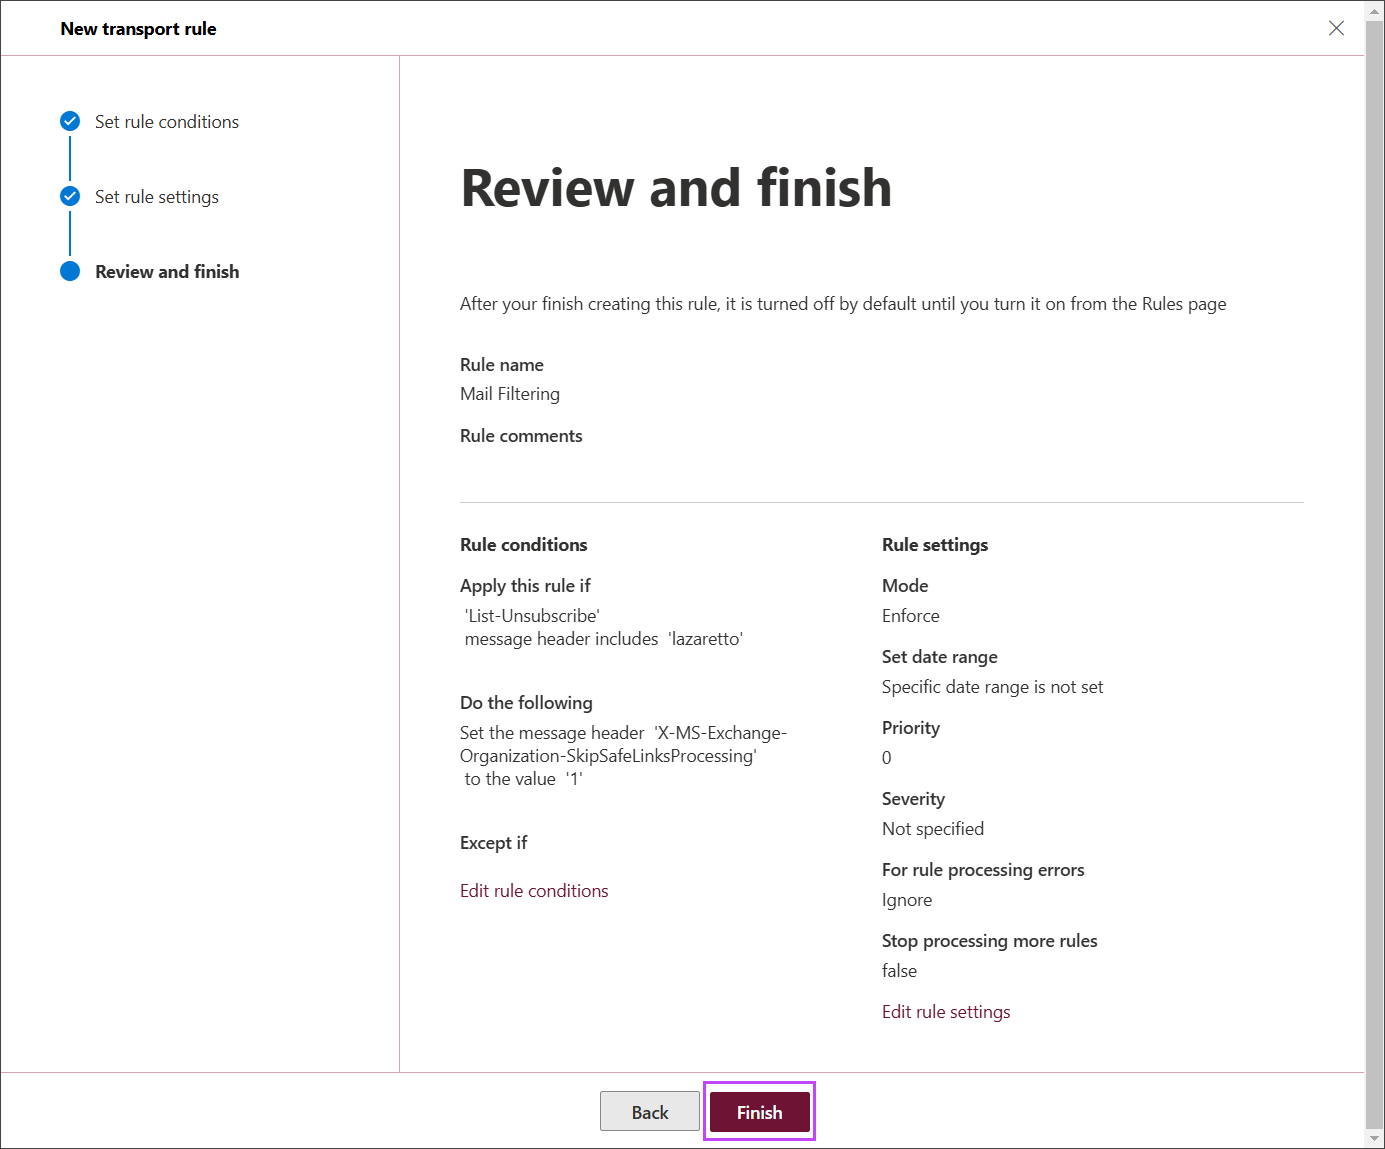
- Apply this rule if… - select the following condition criteria:
- From the first dropdown, select The message headers...
- From the second dropdown, select Includes any of these words
A new line will appear below the dropdown boxes in this section which states "Enter text message header includes Enter words"
- Click Enter text and in the specify header name field, type List-Unsubscribe
- Save this change
- Click Enter words and in the specify words of phrases field, type lazaretto
- Click Add and Save this

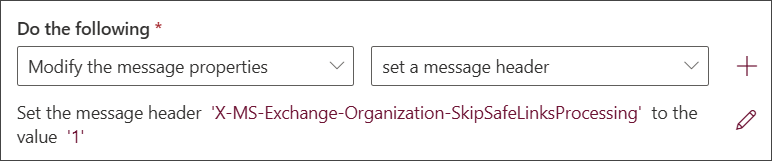
- Do the following… - select the following condition criteria:
- From the first dropdown, select Modify the message properties
- From the second dropdown, select Set a message header
A new line will appear below the dropdown boxes in this section which states "Set the message header Enter text to the value Enter text"
- Click the first enter text and in the Message header field, type X-MS-Exchange-Organization-SkipSafeLinksProcessing
- Save this change
- Click the second Enter text and in the Message header field, type 1
- Save this change
- Except if - Leave these fields empty
- Name - Give the rule a memorable name so that you can easily find it in the list
- Click Next
- Set the rule settings as appropriate for your environment
- Click Next
- Review the rule conditions and settings, and click Finish
- Click Done to return to the Rules page
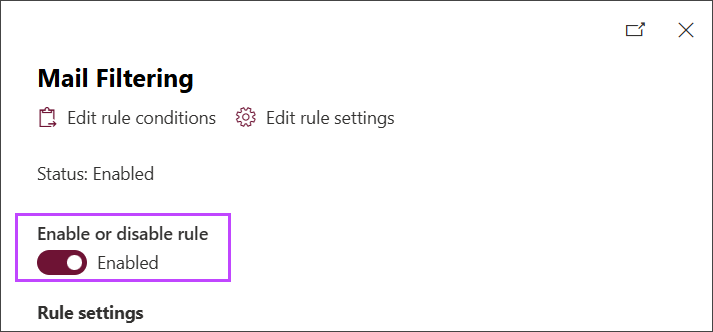
- Ensure the rule Status is Enabled. If it is not, click the Disabled status and enable it using the toggle
Once this rule is created and enabled, Microsoft will no longer scan (and trigger) the links within Email Scout Reports.